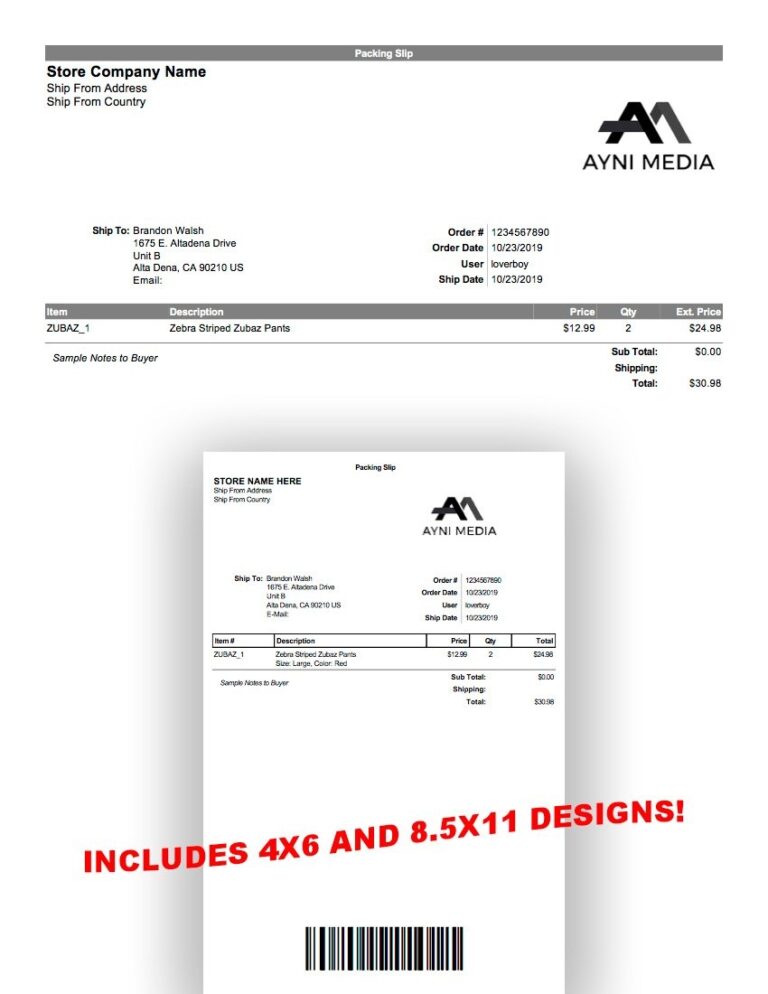
Quickbooks Change Default Packing Slip Template
Are you looking to customize your packing slip template in QuickBooks? Making changes to the default template can help you create a professional and personalized look for your invoices. In this article, we will guide you through the process of changing the default packing slip template in QuickBooks.
First, log in to your QuickBooks account and navigate to the “Sales” tab. From there, select “Customize” under the “Sales form content” section. Click on the “Packing Slip” tab to access the default template. Here you can make changes to the layout, font, logo, and colors to match your brand’s identity.

Quickbooks Change Default Packing Slip Template
Quickbooks Change Default Packing Slip Template
Next, you can add or remove fields from the packing slip template to include relevant information such as order number, shipping address, item details, and more. Once you are satisfied with the changes, click on “Save” to apply the new template to your packing slips.
It’s essential to preview the packing slip template before sending it to customers to ensure that everything looks correct. You can make further adjustments if needed by going back to the customization settings. Remember to save your changes after each modification.
By customizing your packing slip template in QuickBooks, you can create a professional and branded experience for your customers. Take the time to personalize the template to reflect your company’s image and make a lasting impression on your clients.
Now that you know how to change the default packing slip template in QuickBooks, you can enhance the look of your invoices and streamline your shipping process. Follow these simple steps to create a customized packing slip template that represents your business effectively.

Create An Invoice In QuickBooks Online Instructions

MyEducator QuickBooks Basic Customization

How Do I Create A Packing List Bill Of Lading In Quickbooks For

Solved Can I Reformat The Packing Slip To Include More Or